Adding SSH Key Authentication On Digital Ocean Droplet
How to buy a Virtual Droplet on Digital ocean and add SSH key authentication to access servers

A Software Engineer based in Pakistan, Karachi with 3+ years of professional experience developing and releasing software in different programming languages. I believe in being a professional with my commitments and my code. Javascript is my main game.
Authentication is one of the major things one should do after setting up your VPS or Droplet on Digital Ocean a renowned cloud hosting platform. So let's get started in this article we'll be creating a droplet on the Digital ocean and will try to connect to our server or droplet from our command line via SSH public key. Also we'll be learning how to change our user permissions and why is it important to not login or connect to any cloud hosting platform server using the root access.
What is SSH ?
It's important to ask that question before proceeding. SSH or Secure Socket Shell allows the user to connect to different nodes or servers via using an encrypted private key that only that user who is trying to login has. There are 2 keys generated via SSH which we later discuss how to create them called the Public and Private keys. The Public key is passed down to the server and whenever the user has to connect to the server he has to connect it using its private key. The SSH authentication process is by far the most secure authentication process there is available the power of cryptography at its best.
Simply follow these steps to create an SSH key on your system which we would later use to connect it our server on the Digital Ocean platform.
Steps:
- First we'll move to our .ssh directory which is usually a hidden folder on the root directory of our system. so cd ~/.ssh would do the trick.
You can also ls in the .ssh folder to see if there are already any public or private keys available in your folder. As you can see I already have one. fsfe2 is my private key and fsfe2.pub is my public key. But nevertheless, we'll create a new one for the sake of this blog.

The ssh-keygen command is used to create a pair of new public and private keys in your system.

The prompt is asking us as to which file we want to save our pair in by default there is an id_rsa file in which you can create for your SSH if you already don't have one. So simply pressing enter will create that. But in our case, we will provide a new name of a file for our new SSH keys called new_ssh
- It will prompt us for a passphrase which will be asked when we'll be connecting our server using the SSH key if you want to use it you can but it's optional so I'll just hit enter and skip that.
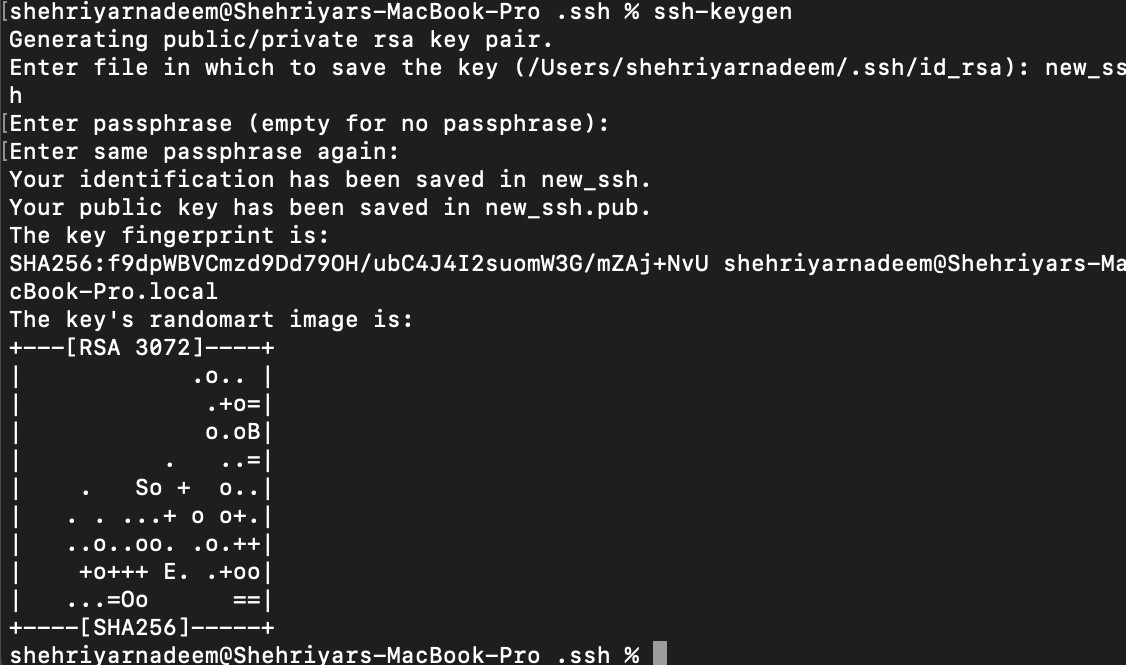
- ls to check the new SSH pair created and you'll find new_ssh which is your private key and new_ssh.pub which is your public key.
With those easy and simple steps, we have finally created our SSH keys which we are going to use to authenticate and access our server on the Digitial Ocean.
Creating Our Server/ Droplet on Digital Ocean
Before started let's just first clear the confusion between a Droplet and a Server. When you purchase a Droplet on Digital Ocean one thing to keep in mind is that you are not purchasing the whole server but just a piece or slice of some existing server. As you don't have to use the whole server which has a lot of memory instead you just require a couple of GB's and for that obviously you don't require the whole server. So for that reason, cloud hosting platforms such as Digital ocean provide us with a piece or slice of some already existing server that has some free memory to use and that is called a Droplet
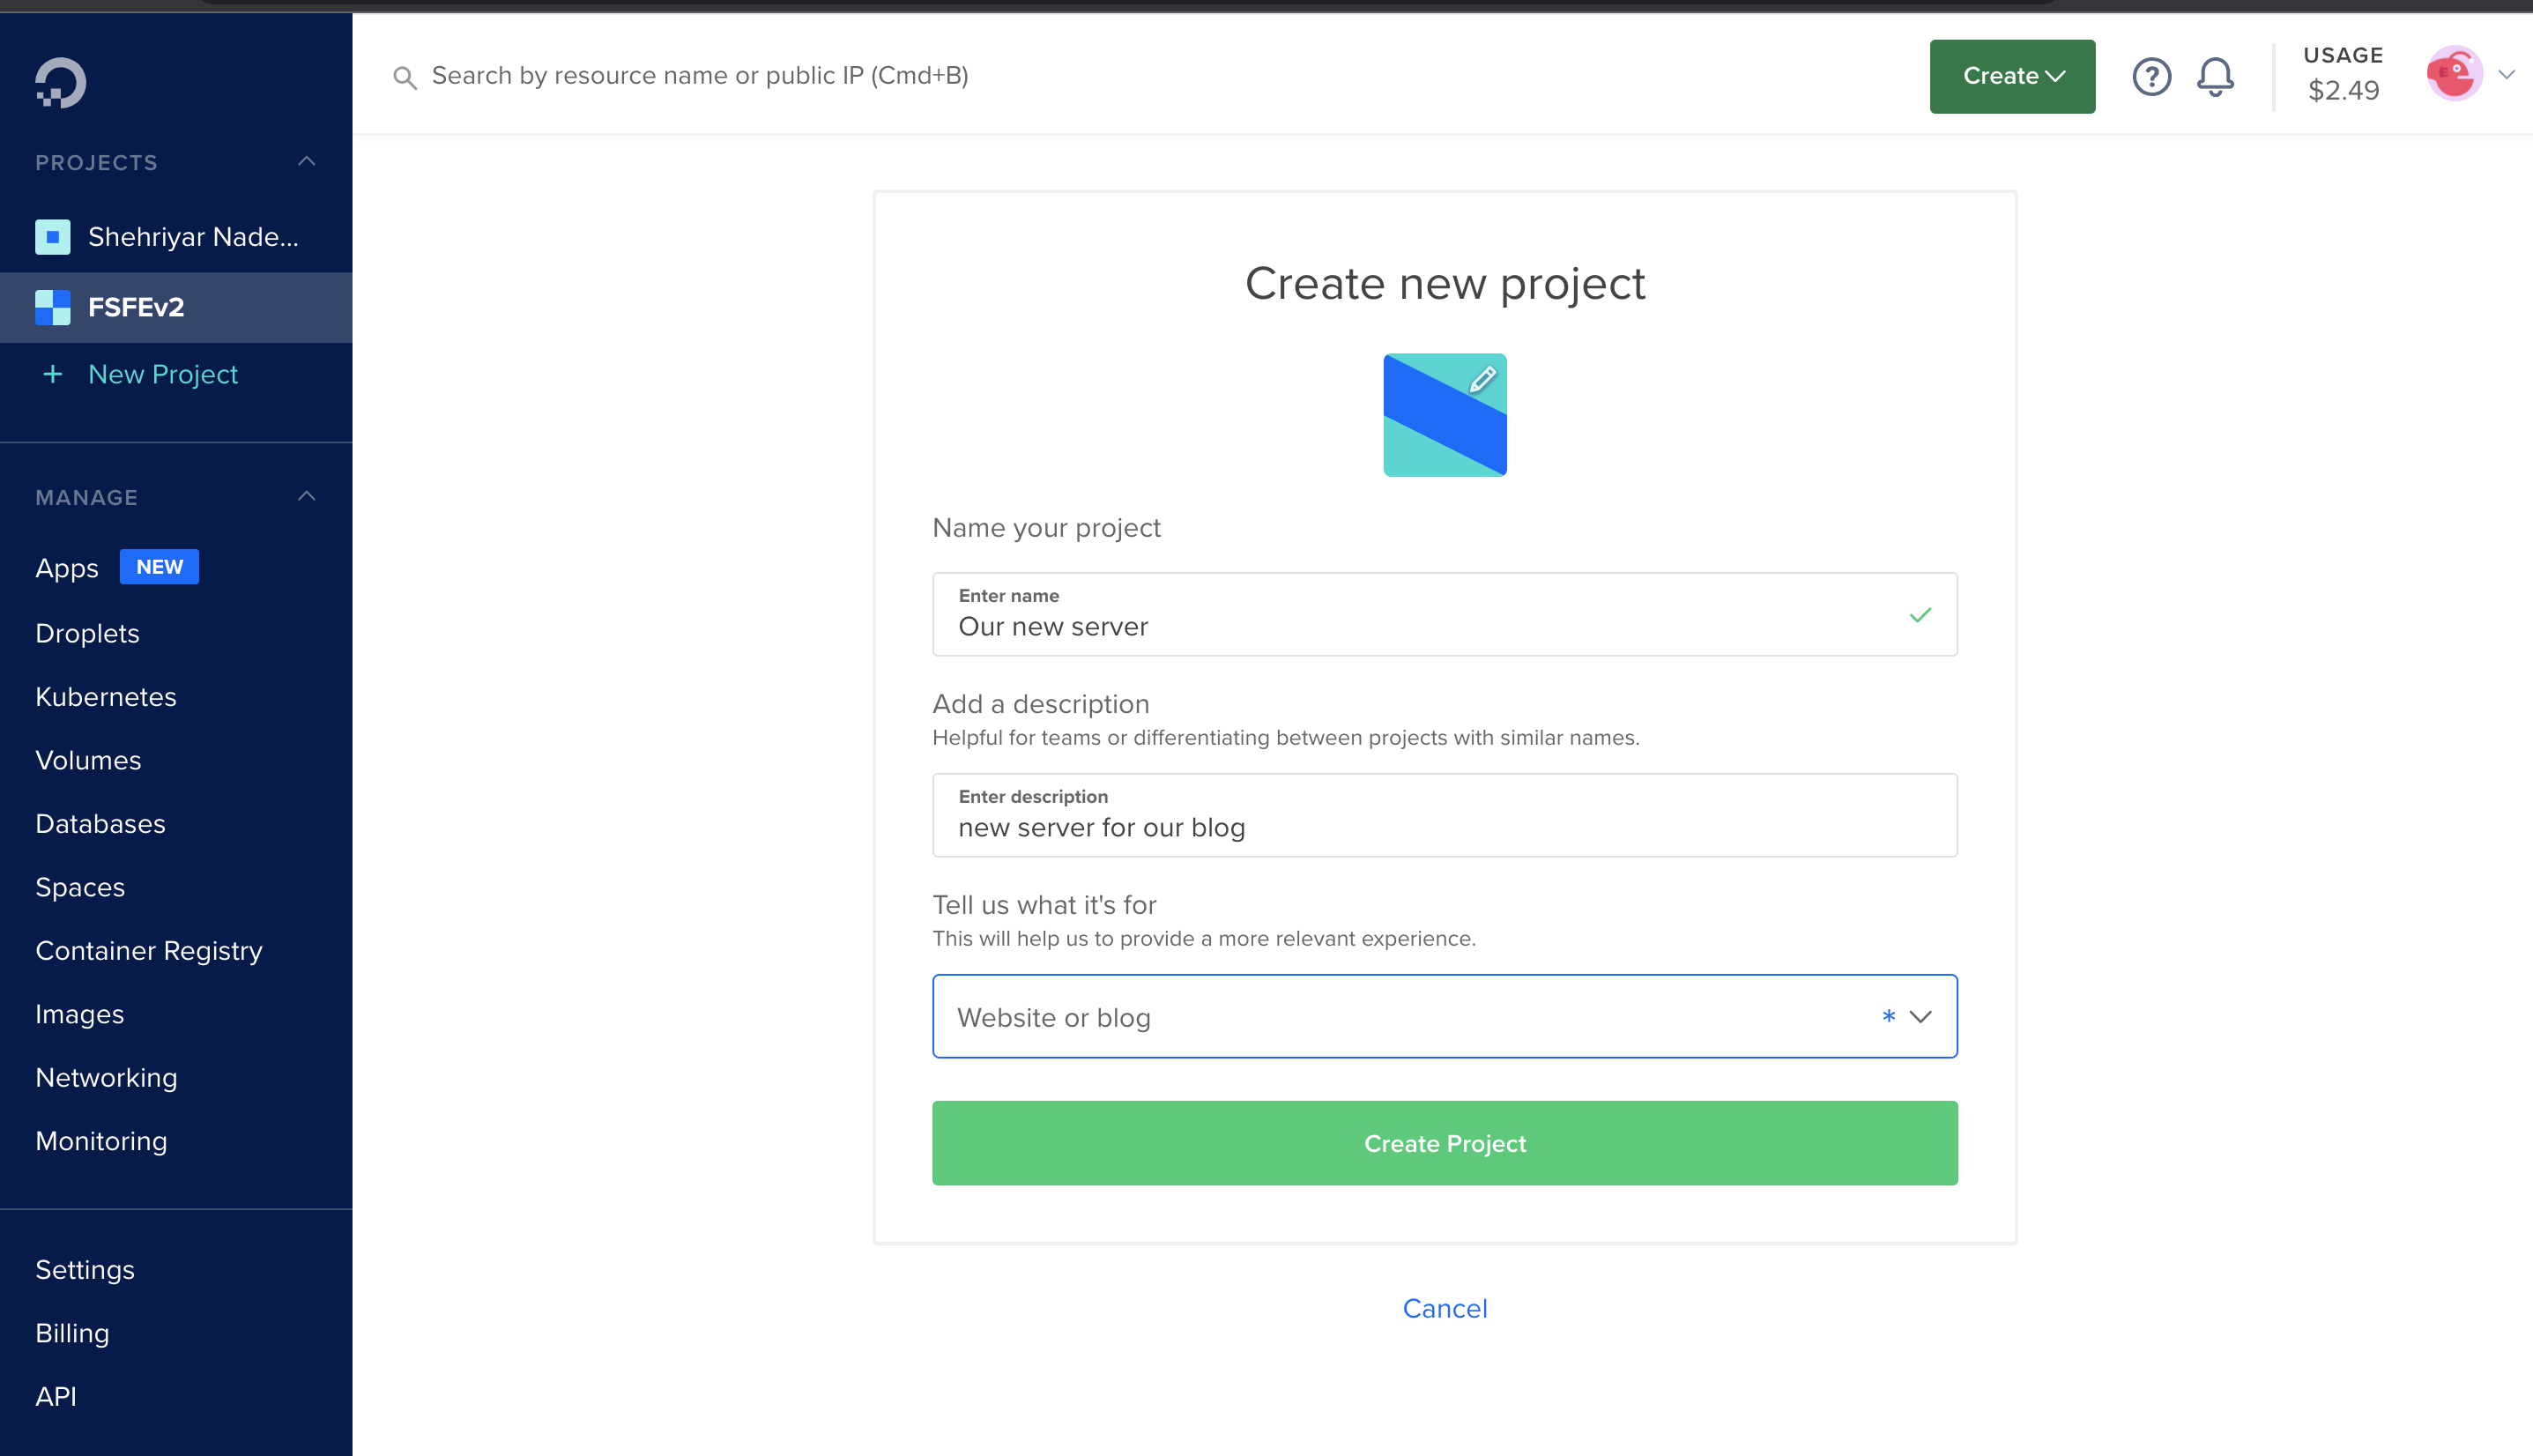
So let's create. our first droplet. Simply login into the digital ocean and click on the New project button to create a new project for our droplet.
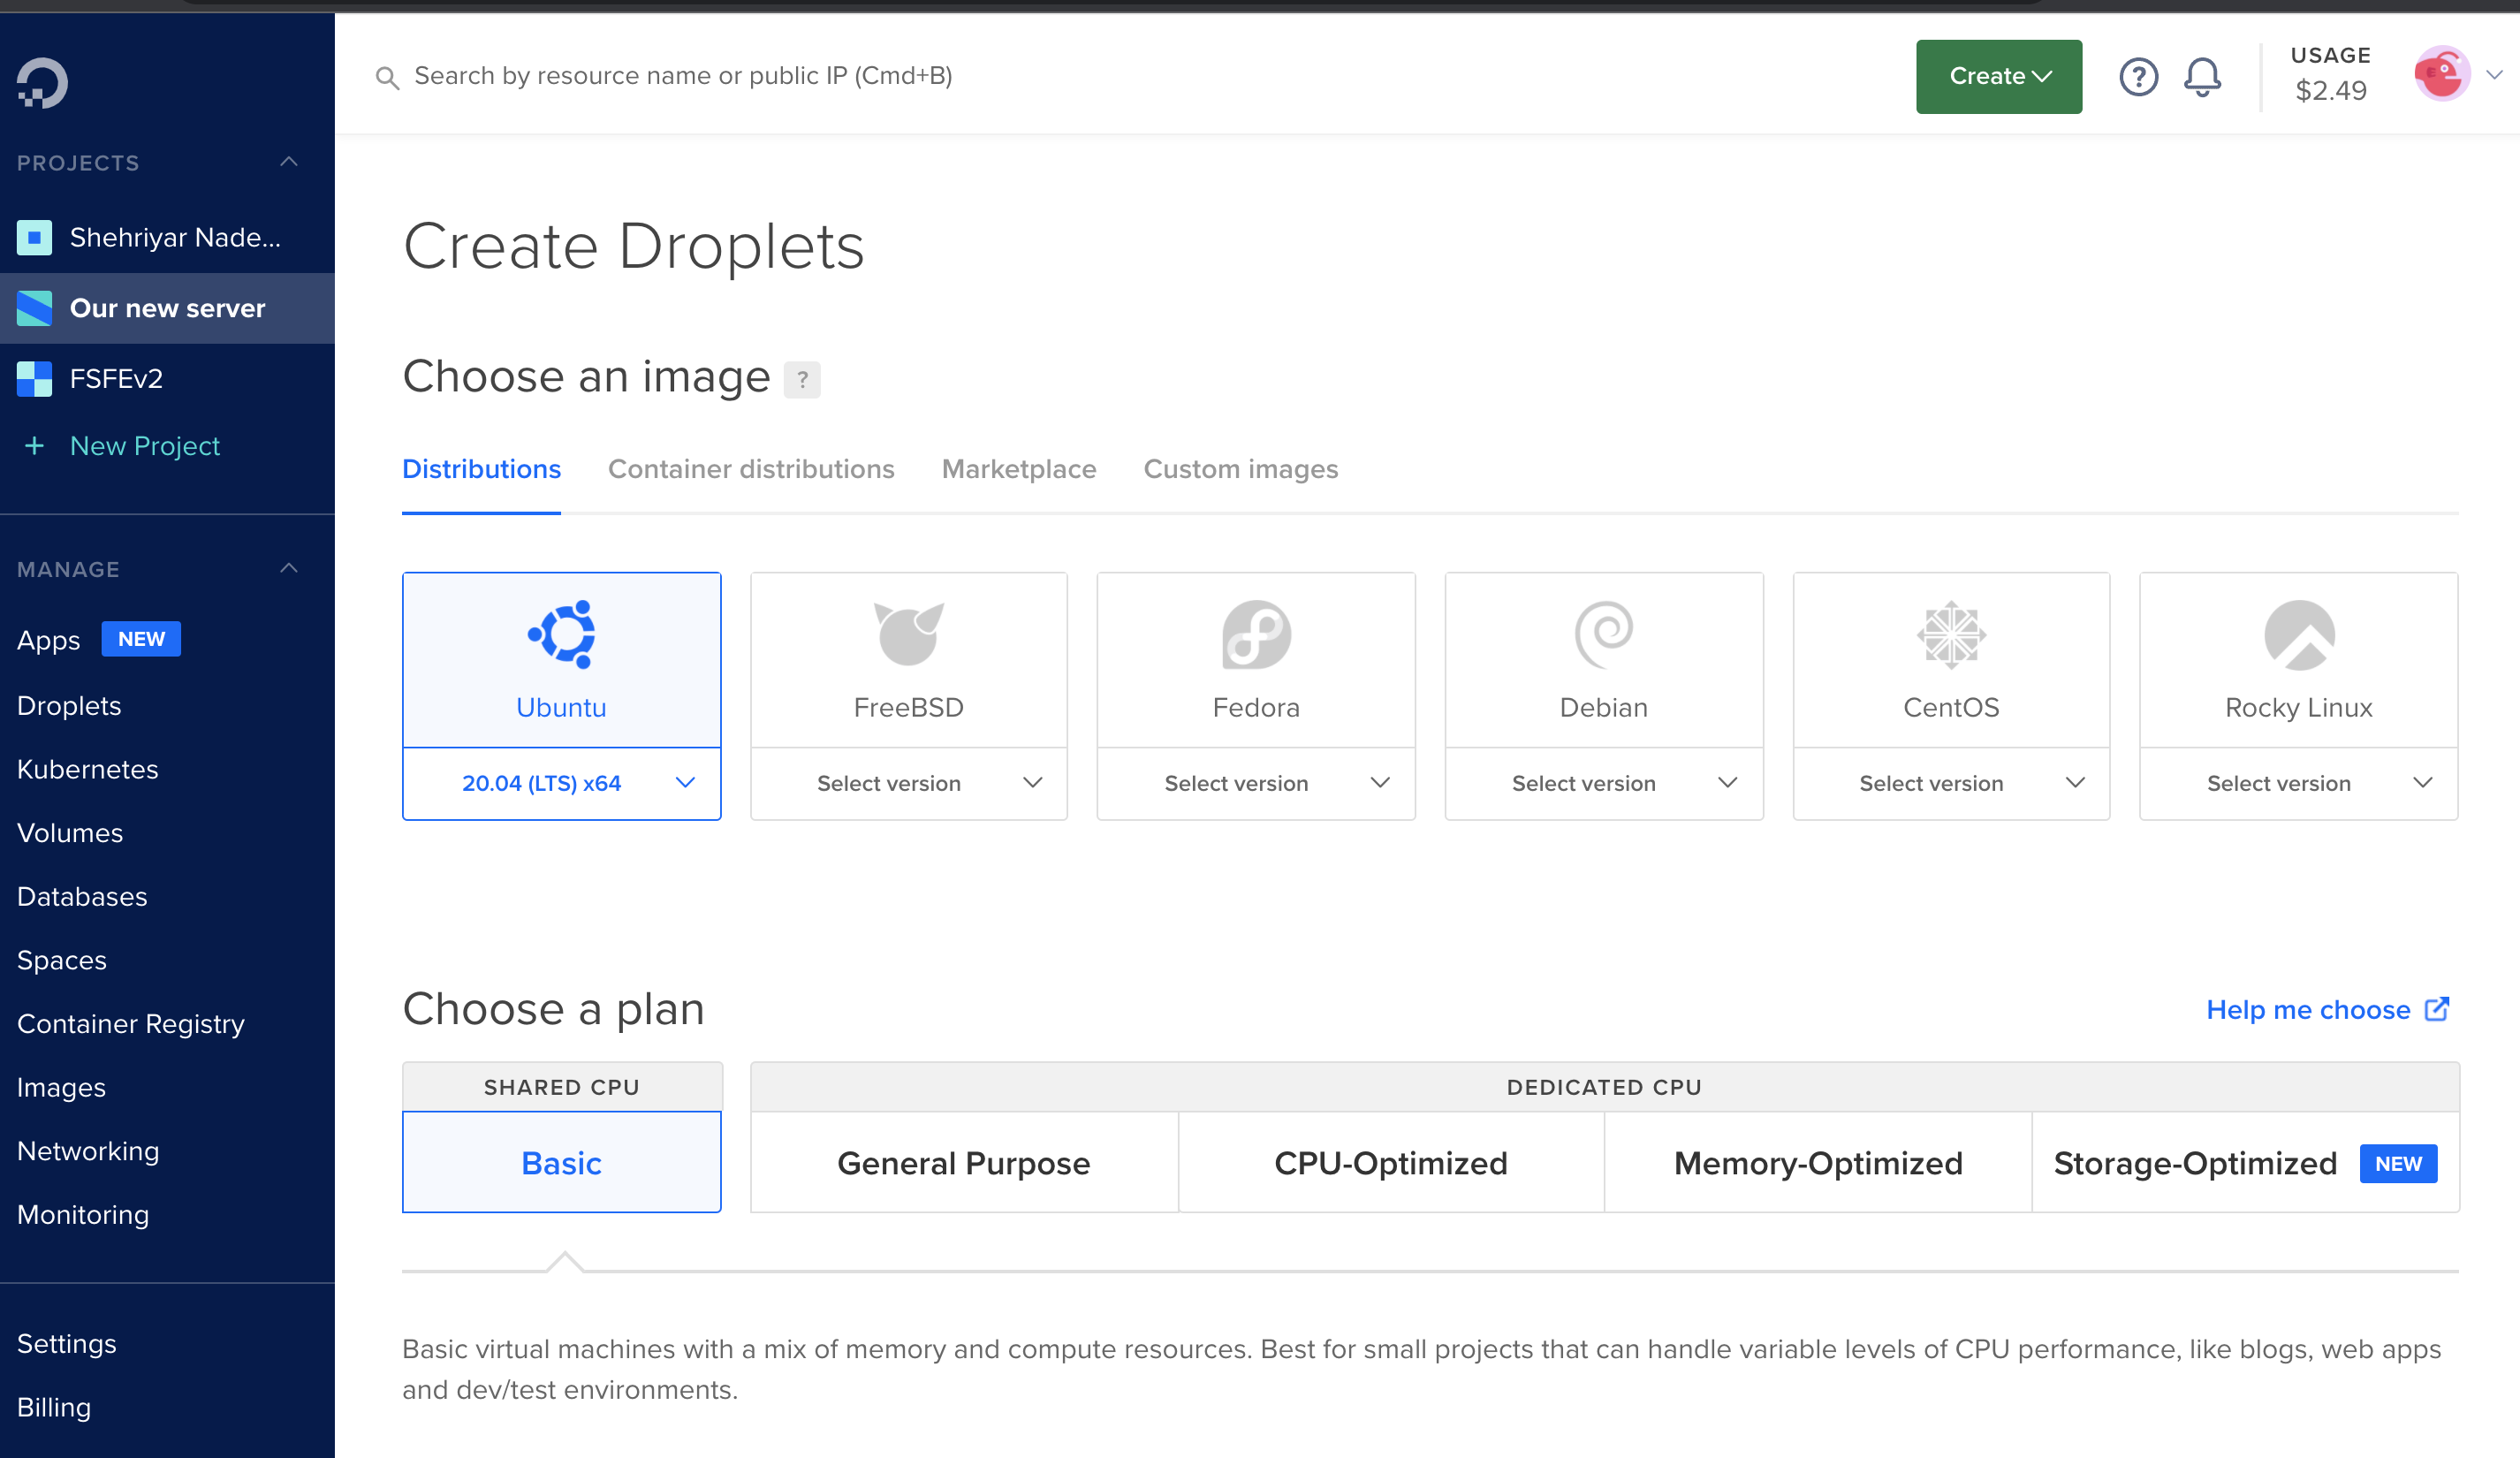
Next, you'll be asked a couple of options to choose your server operating system and billing I'll go with everything basic and Ubuntu as my OS for the server.
Followed by that on the same page we'll be asked for our authentication process and we'll go with the SSH method since we have to use our SSH keys generated to access our server.
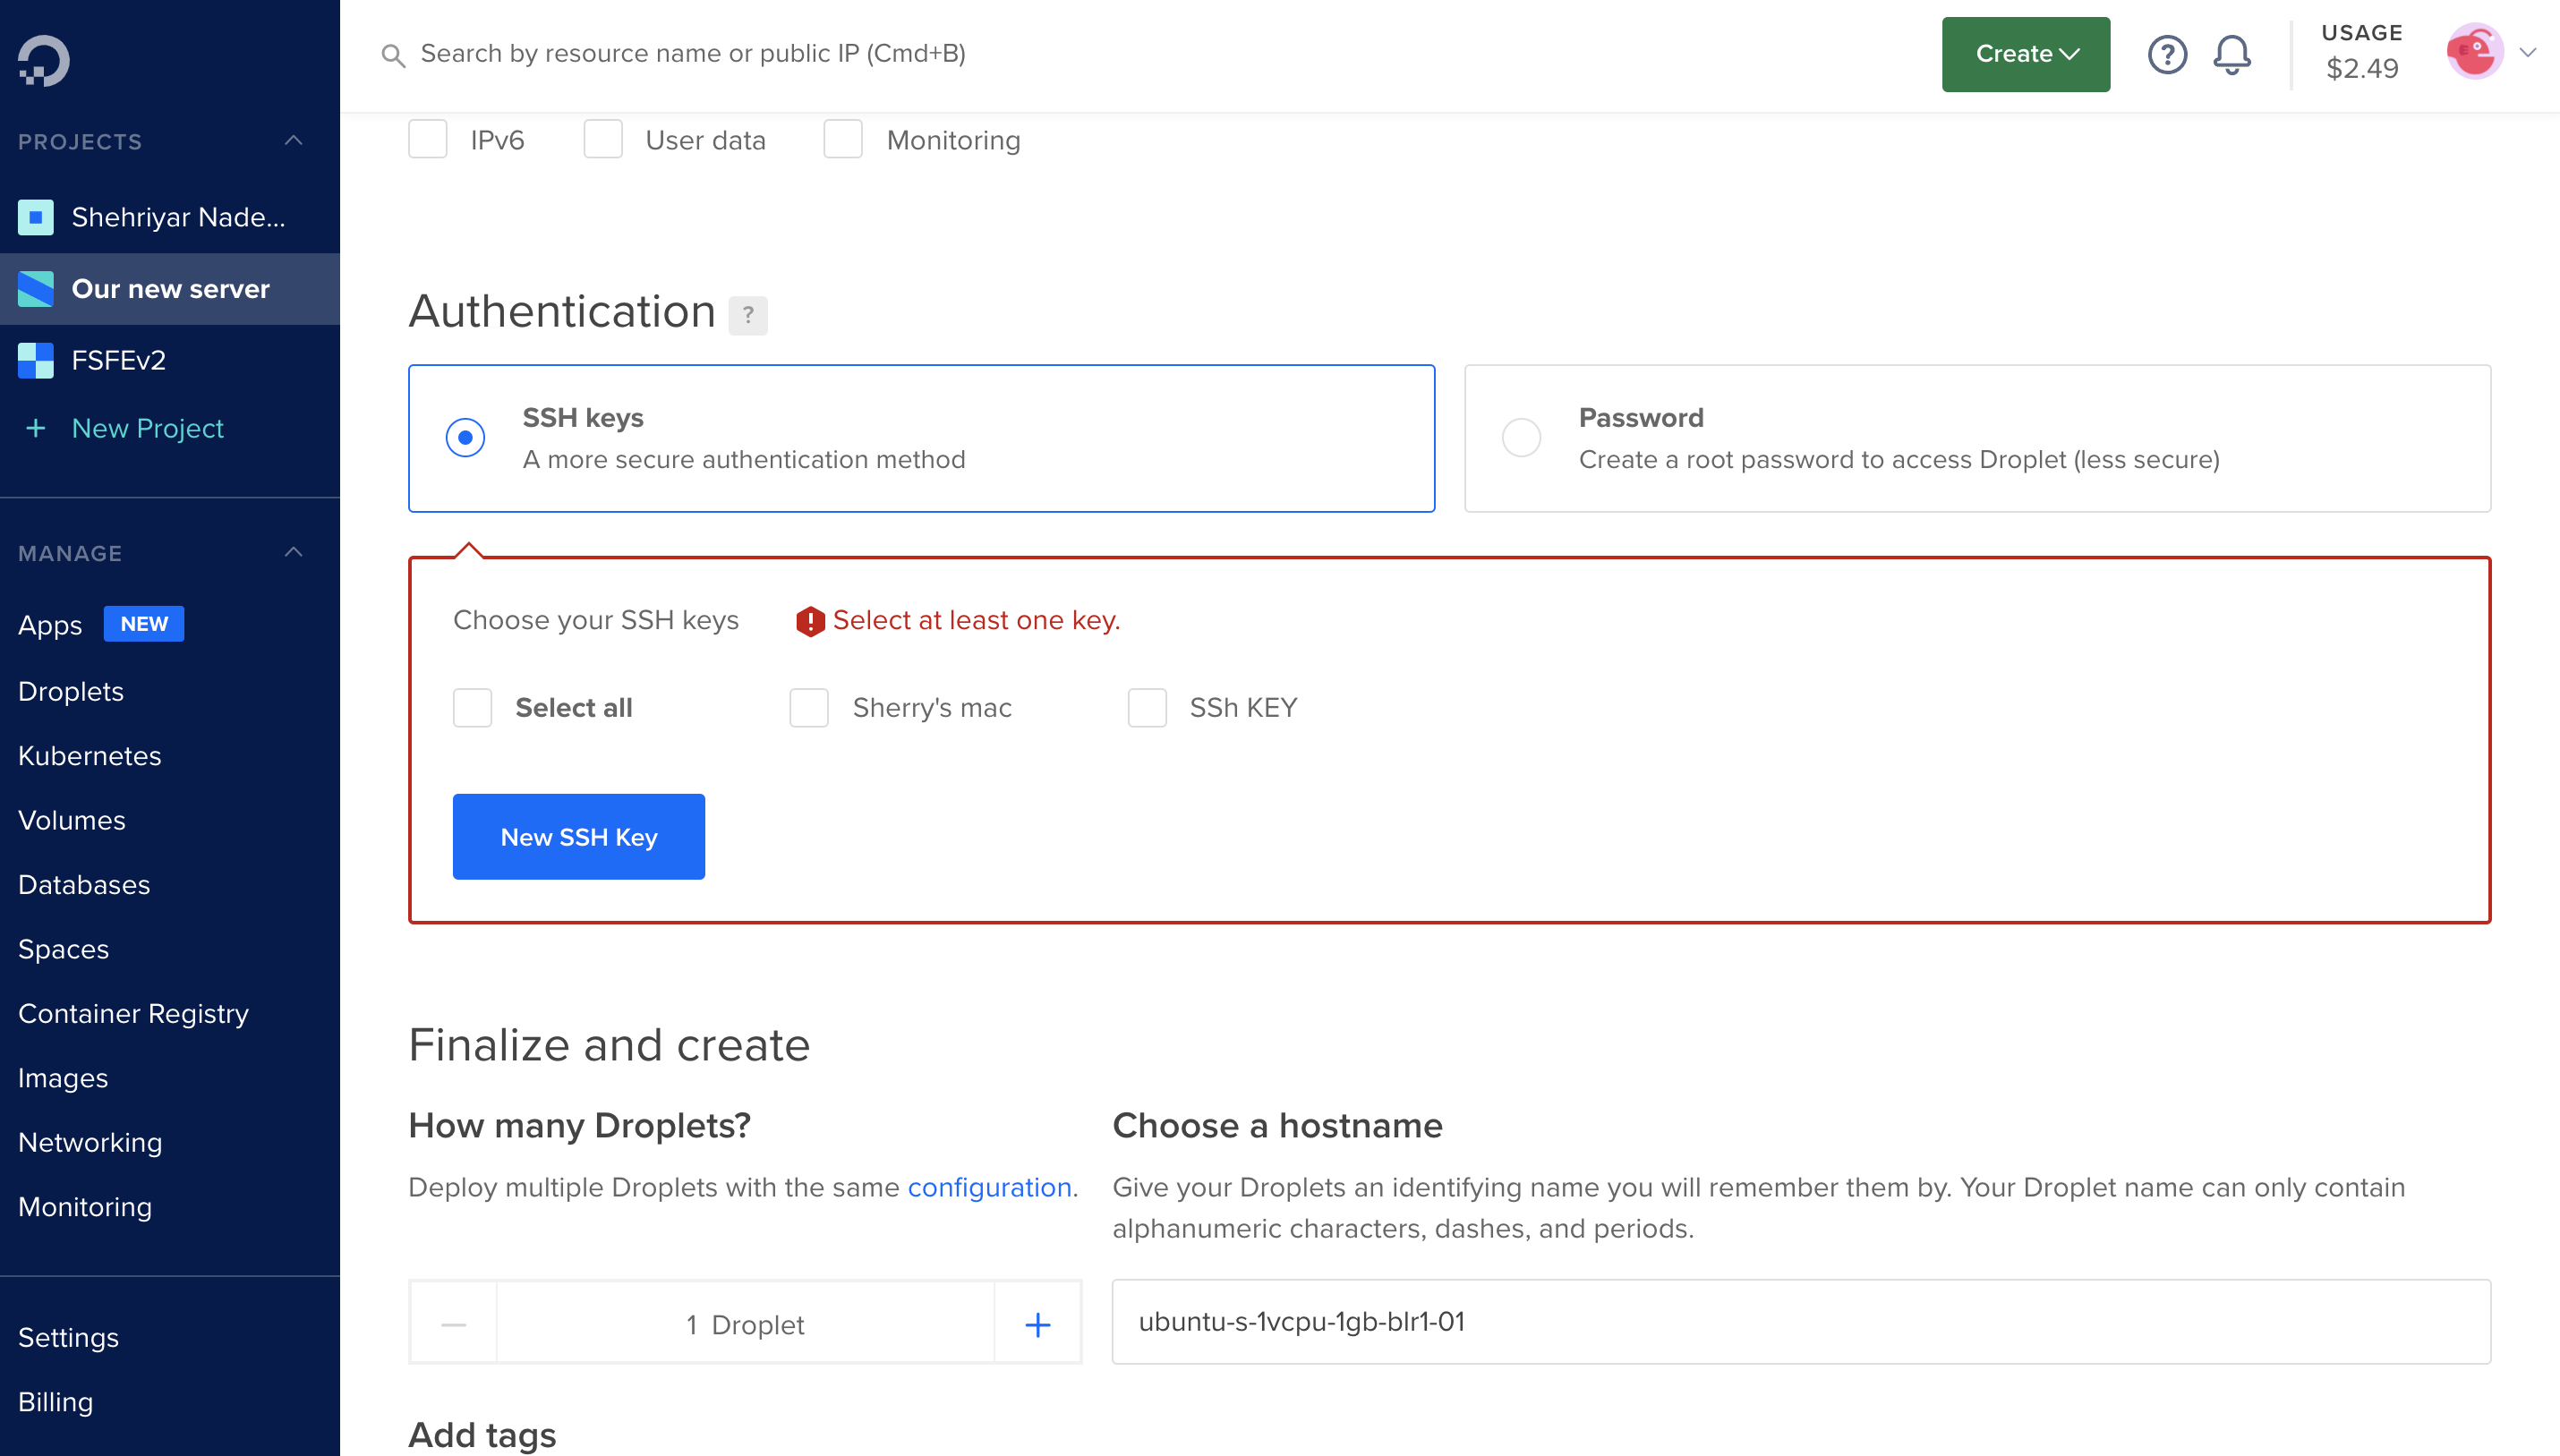
We need our SSH public key here to add it for the SSH key section like this here:
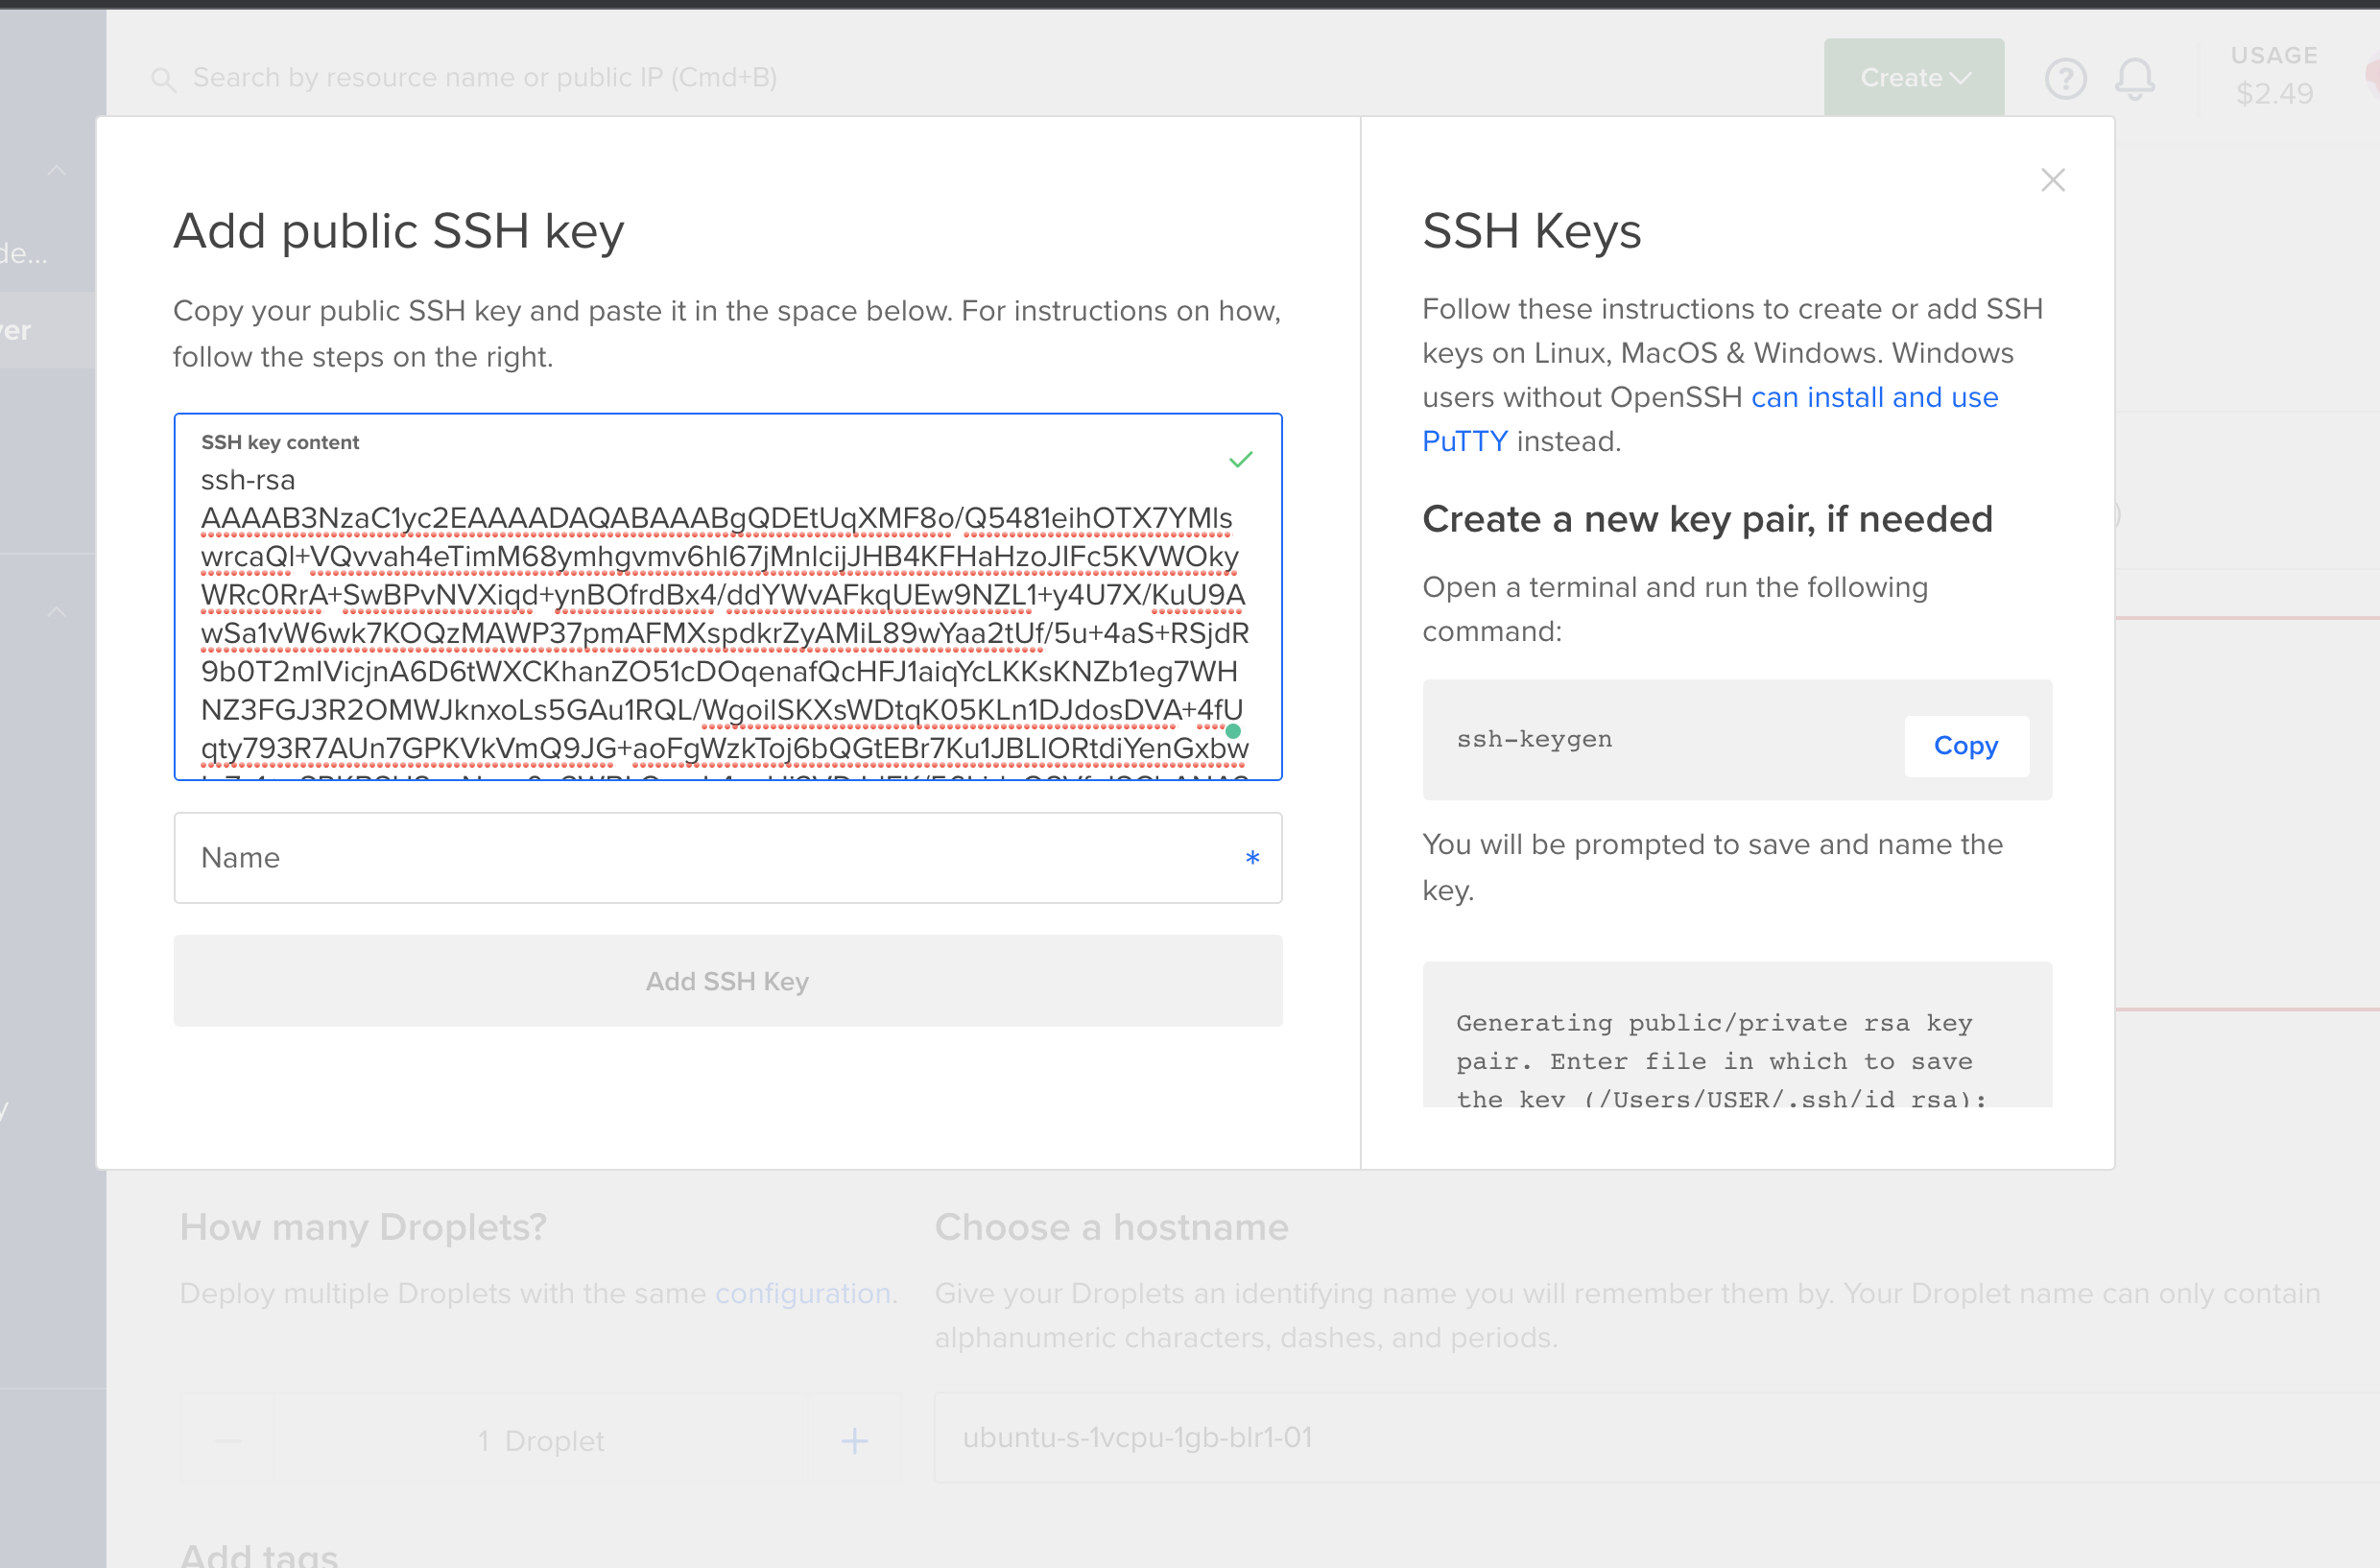
We can get our SSH public key simply by cat new_ssh command in the terminal and paste it.
So here comes the final step accessing our server with the SSH authentication setup made for our droplet. And it's as simple as it can be. On our Droplet dashboard, there is an IP address which is for now also the default domain name for our droplet to access. So we need to copy that first.

And in our terminal we just have to run ssh -i new_ssh root@143.110.189.44 and we are logged into our Digital ocean Droplet. Yes, we are here that's how easy and simple it was.

The root is our default user for accessing our droplet.
If you found my blog useful please show your support by sharing and liking this blog. Thanks and Happy coding.


